

Replacing the rear springs on a W202 is much much easier than tackling the fronts (you can find a guide for replacing the front springs here: https://motorsportformentalhealth.com/2019/01/13/how-to-replace-a-w202-front-spring/). However, it’s still quite a daunting task if you’ve not done it before, so I thought I’d put together a quick guide to walk you through the process.
You will need:
-Two 18mm sockets
-Two breaker bars or a breaker bar and impact gun
-10mm socket
-Penetrating spray
-Mercedes spring compressor (Please note that there area couple of old forum posts that say you don’t need the compressor, I found it useful though especially when getting the lower arm back into place)
-A floor jack and axle stands
-A mallet
-A small and larger pry bar.
First step, of course, is to jack up the corner of the car you’re working on, rest it securely on a jack stand and remove the wheel.
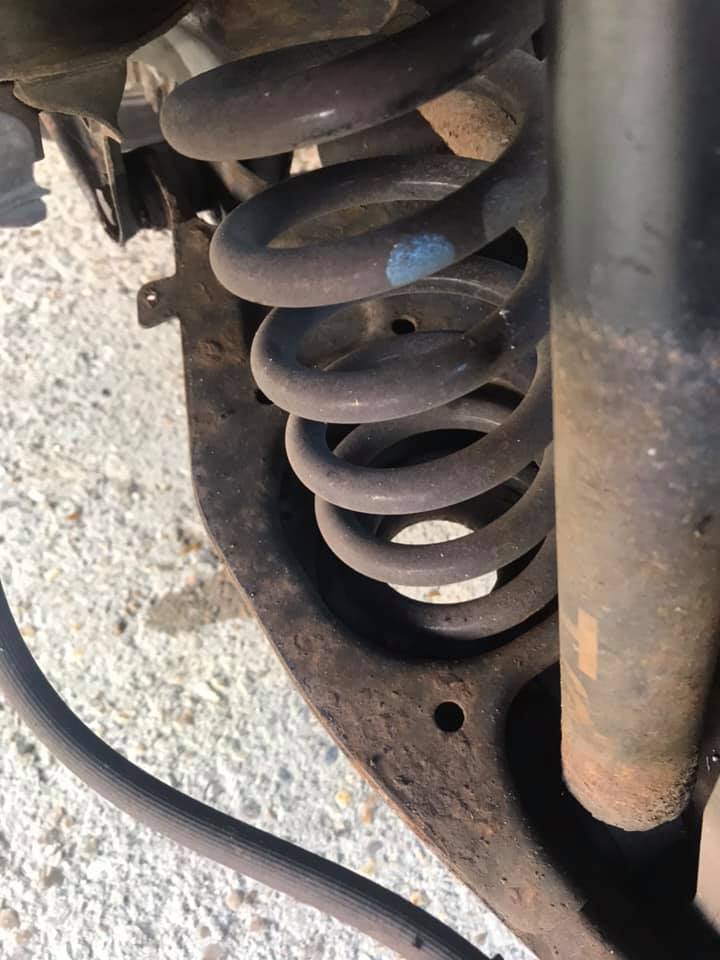
Once the wheel is removed you’ll be able to see the spring. Normally if the spring has snapped, it will go at the very bottom coil. If you look down into where the spring is housed in the arm, you should be able to see the break.

The compressor goes into the spring through the lower a hole in the lower arm. To expose it you’ll have to remove the plastic dust cover. It is held on by a 10mm headed screw either side (circled in red) remove the screws then gently pry the dust cover off.
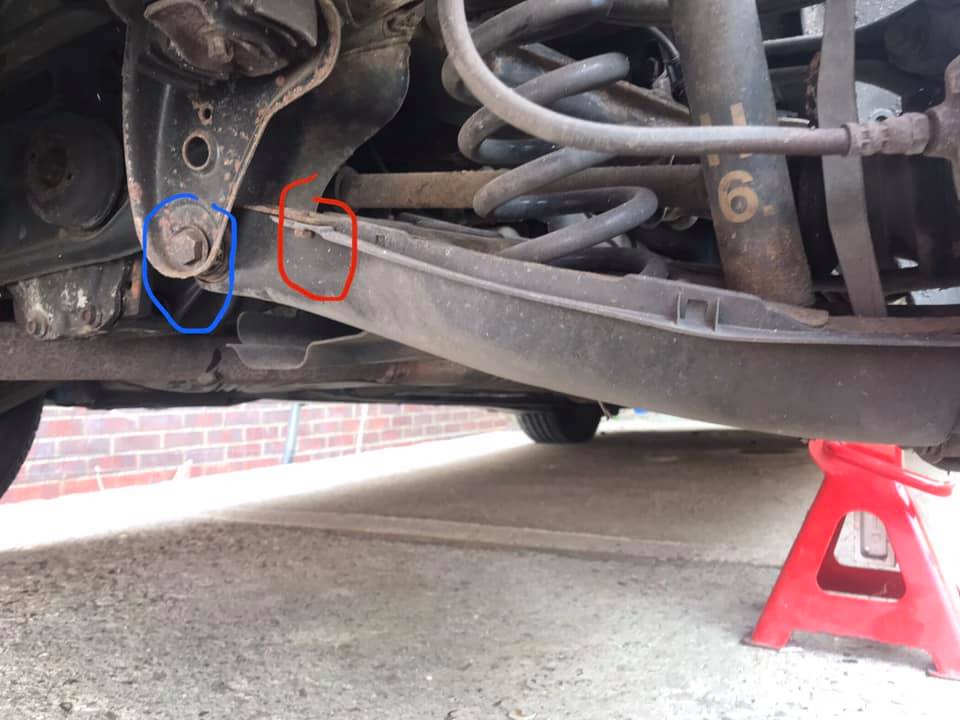
The bolt circled in blue is the 18mm which holds the lower arm onto the subframe. We’ll get to removing that in a bit, but the photo showed exactly where the bolt is, so I thought I’d point it out for future reference and this is a good time in the procedure to give both sides a good coating of penetrating spray.
With the dust cover removed, you can see the hole under the spring that you need to feed the compressor through.
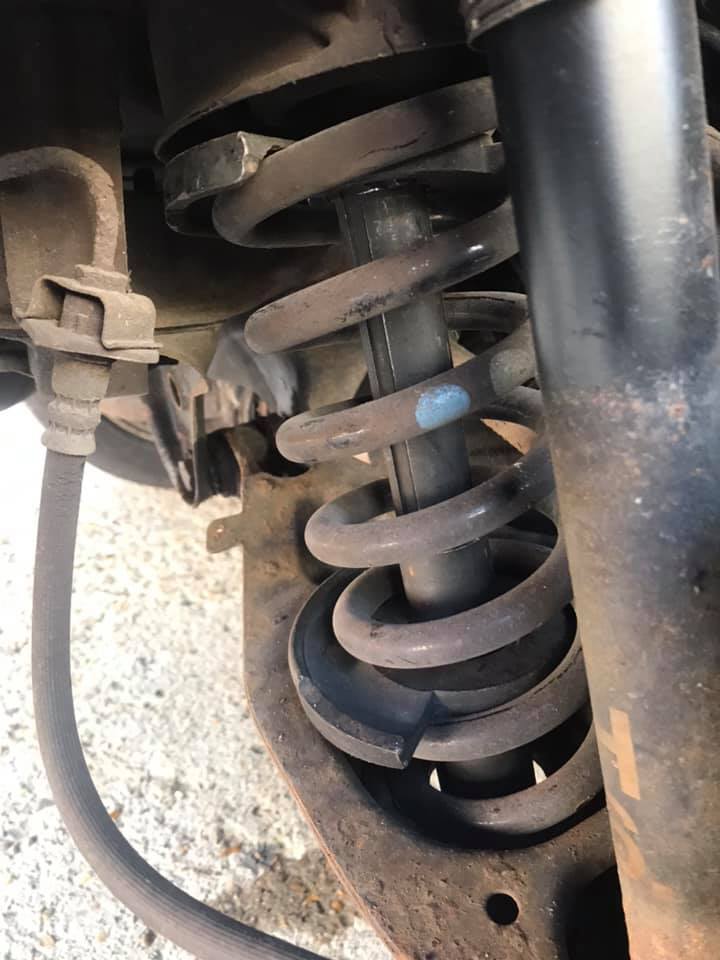
Pop the spring compressor plates in at the top and bottom of the spring, then feed the compressor through and twist it so the little claw bits on the top of the compressor fit into the notches on the top plate.
Begin to tighten it, but make sure that the bottom of the compressor passes through the lower arm. My compressor was quite a tight fit, and it took a couple of goes to get it through.
Once your compressor is tightened, loosen off the joint between the lower arm and subframe. I held the nut with one 18mm socket and breaker bar, and turned the bolt with the other. It will be stiff, it’s possible that this bolt hasn’t been removed in over 20 years, which is why coating the nut and bolt in penetrating spray will be a good idea.
As soon as the bolt is nearly out, raise your jack under the joint to support it as you remove the bolt. If the arm doesn’t drop down immediately, giving it a light tap with your mallet will get it to drop.

Now remove the spring and replace with your new one. I could actually wiggle the spring into place without compressing it, Make sure that the ends of the spring line up with the groove in the rubber boot at the top and the groove in the bottom of the lower arm.
Now jack the lower arm joint back up a bit and replace the compressor. I found that without the spring compressed, the tension that the spring was putting on the lower arm was moving it forward, and so I couldn’t get it to sit back in its’ mounting on the subframe.
Getting the arm lined up for the bolt to go back in is actually the fiddliest part of this job as it’s a really tight fit. You may need to move the arm about a bit to get the holes lined up. Once you have, insert the bolt. The bolt may need tapping in with your mallet.
Now tighten the nut back up, put the dust cover and wheel back on and the job is done!
Thanks for reading, I hope this helped! If you would like to stay up to date with all my blog posts please subscribe to the blog via email (from the box at the bottom of the page).
Follow me on the following social media platforms:
Facebook: www.facebook.com/motorsportformentalhealth/
Linkedin: www.linkedin.com/in/richard-francis-b45025137/
TikTok: @richardfrancismsfmh
Twitter: @richardmsfmh
Instagram: @motorsport4mentalhealth
Youtube: www.youtube.com/channel/UCQ-j8broFg4i2rWIBy6W82Q
By Richard Francis