

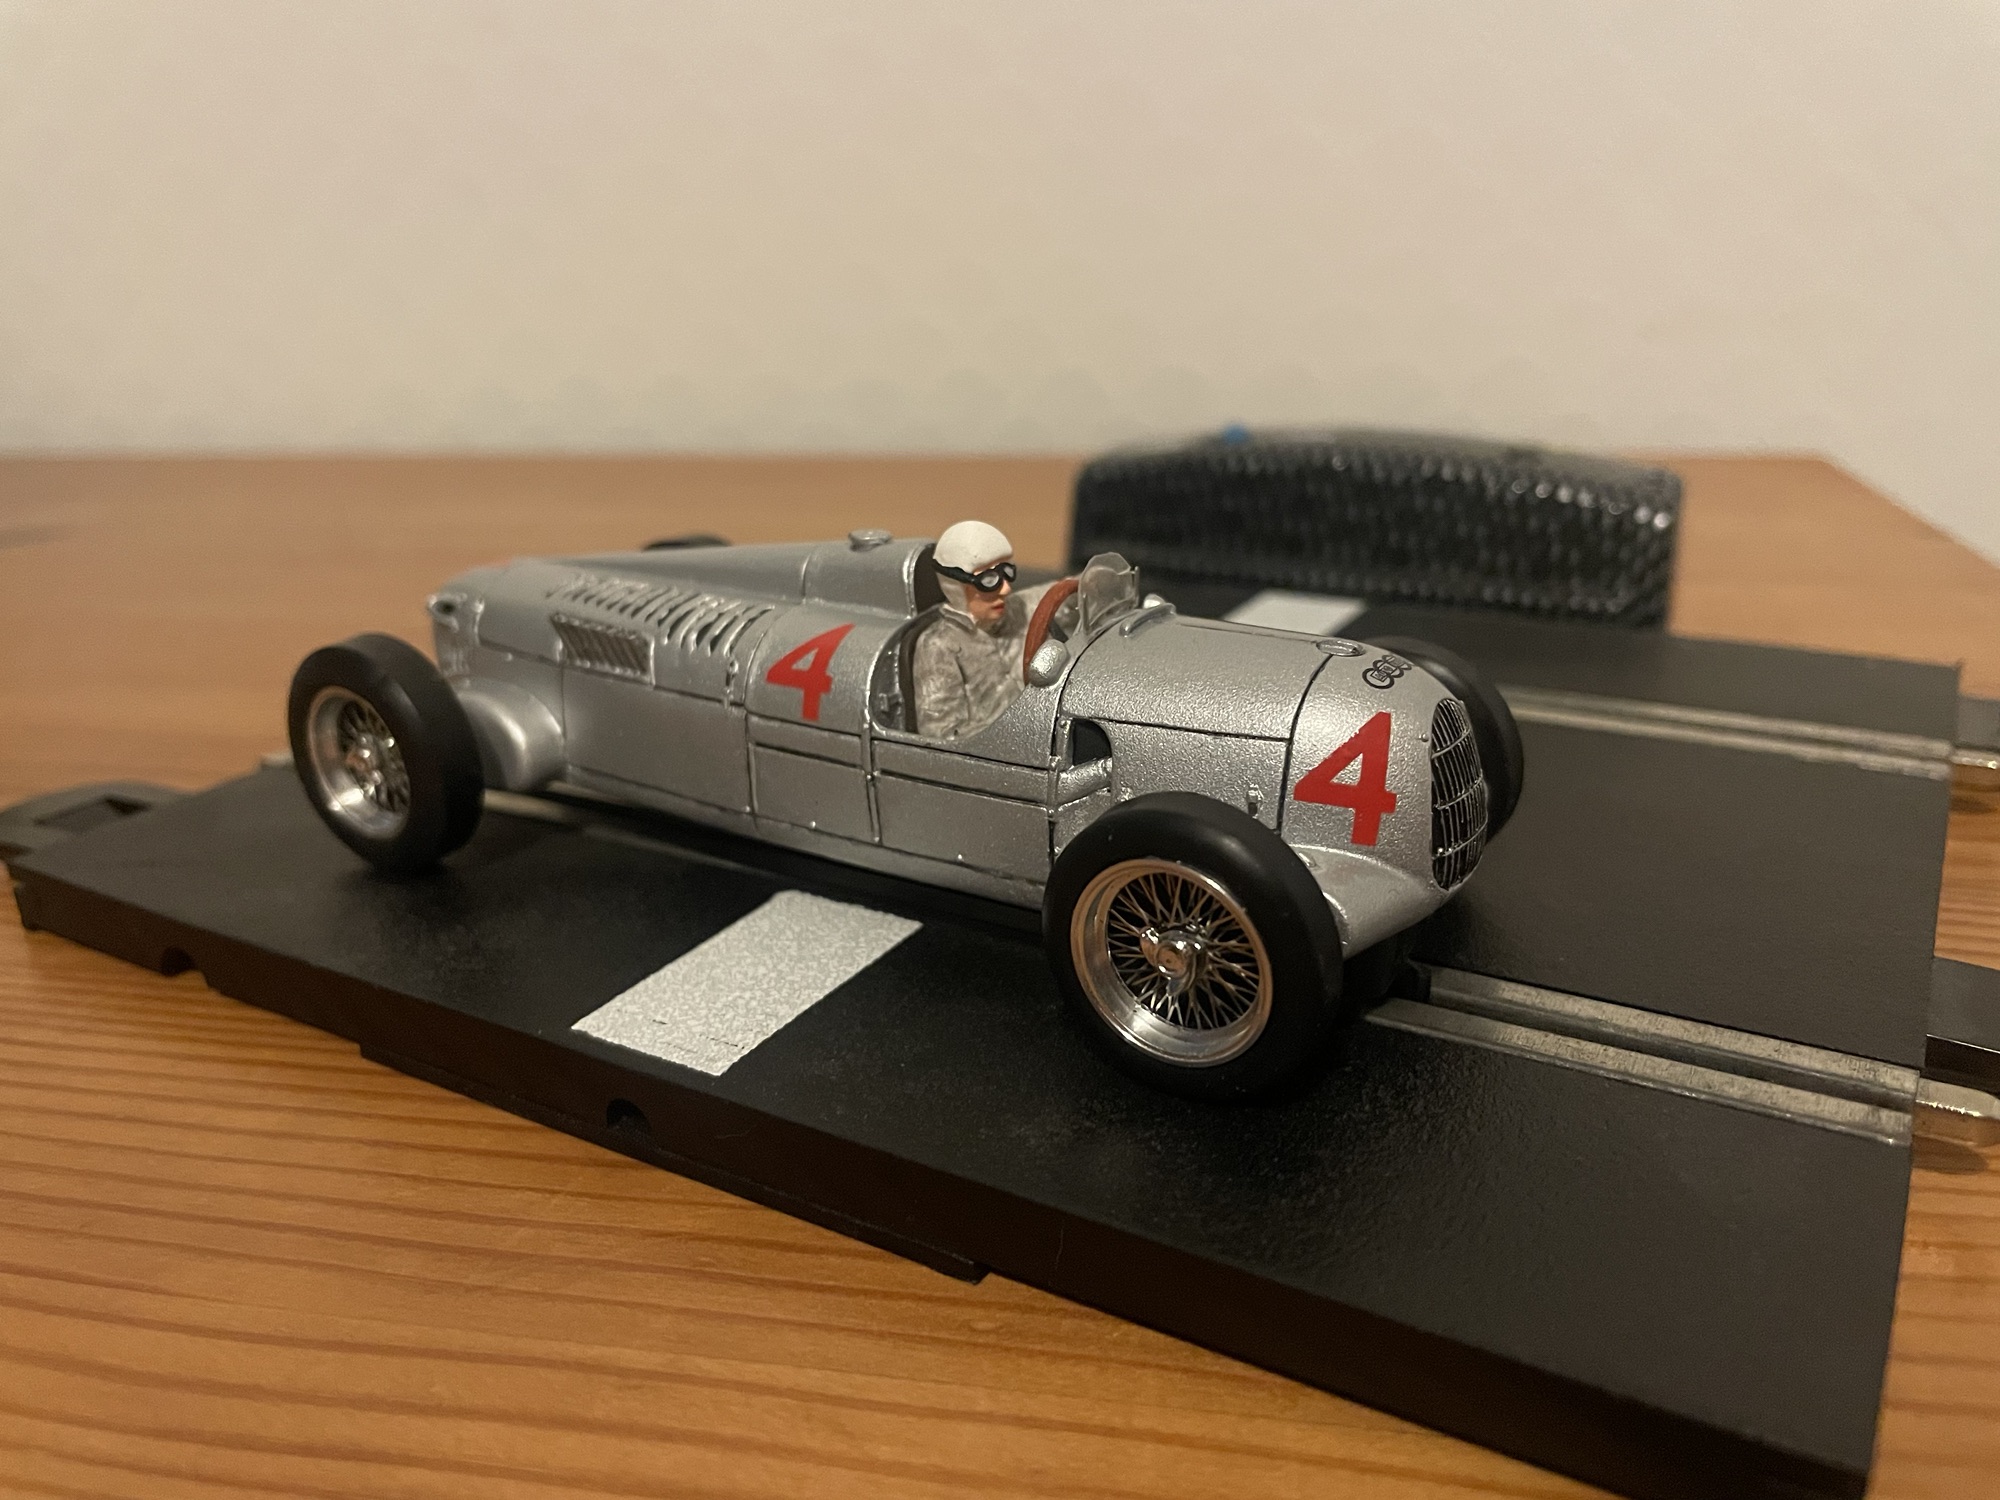
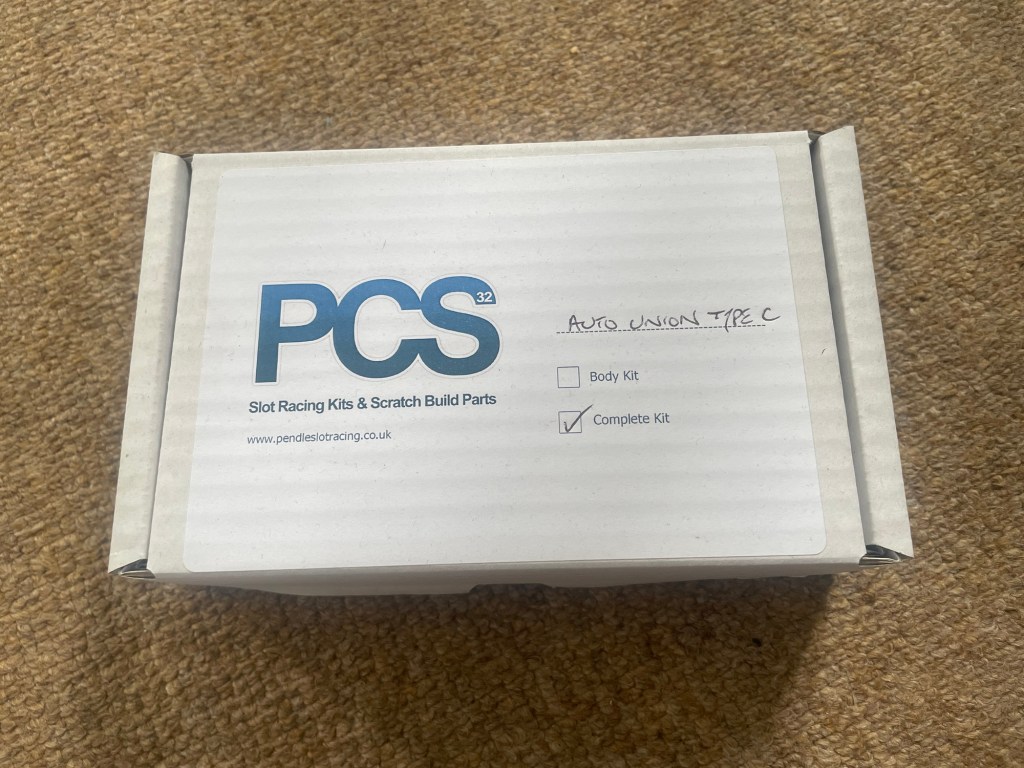
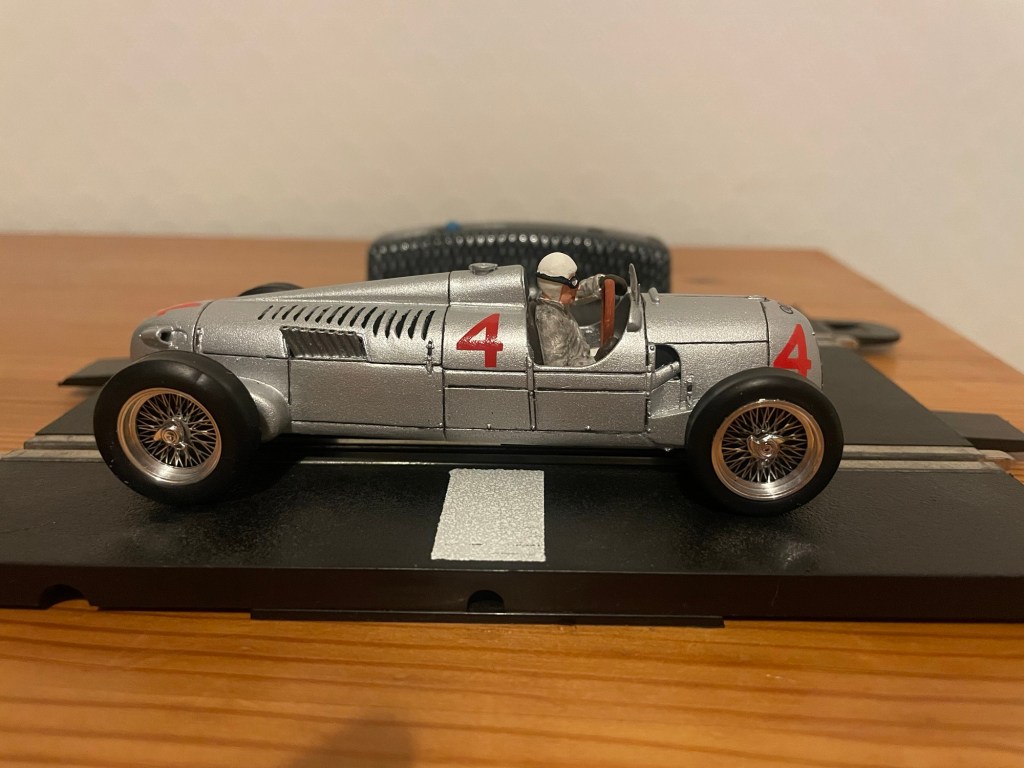
Today we’ll be building the Auto Union Type C by PCS from Pendle Slot Racing. This will become a representation of the car driven to 2nd place by Achille Varzi in the 1936 Monaco Grand Prix.
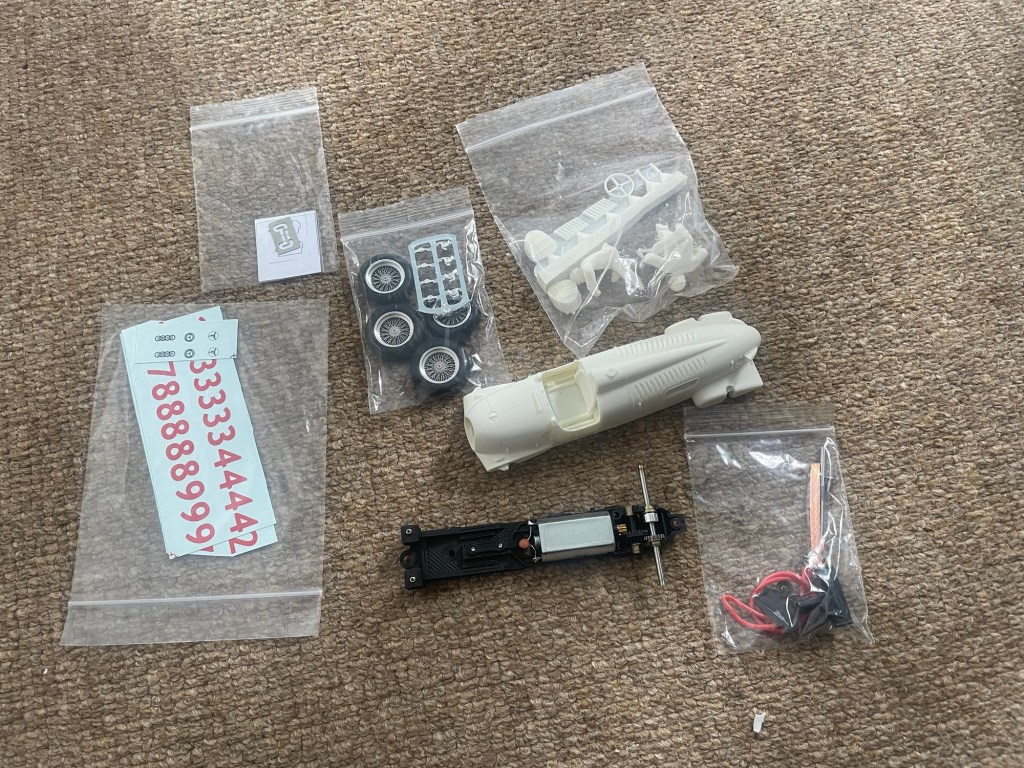
I’ve used plenty of PCS parts for different cars over the years, but have never actually built one of their full kits before. Any of the kits I’ve built from Pendles in the past have come from their Penelope Pitlane range or OCAR. So I’m looking forward to this build!
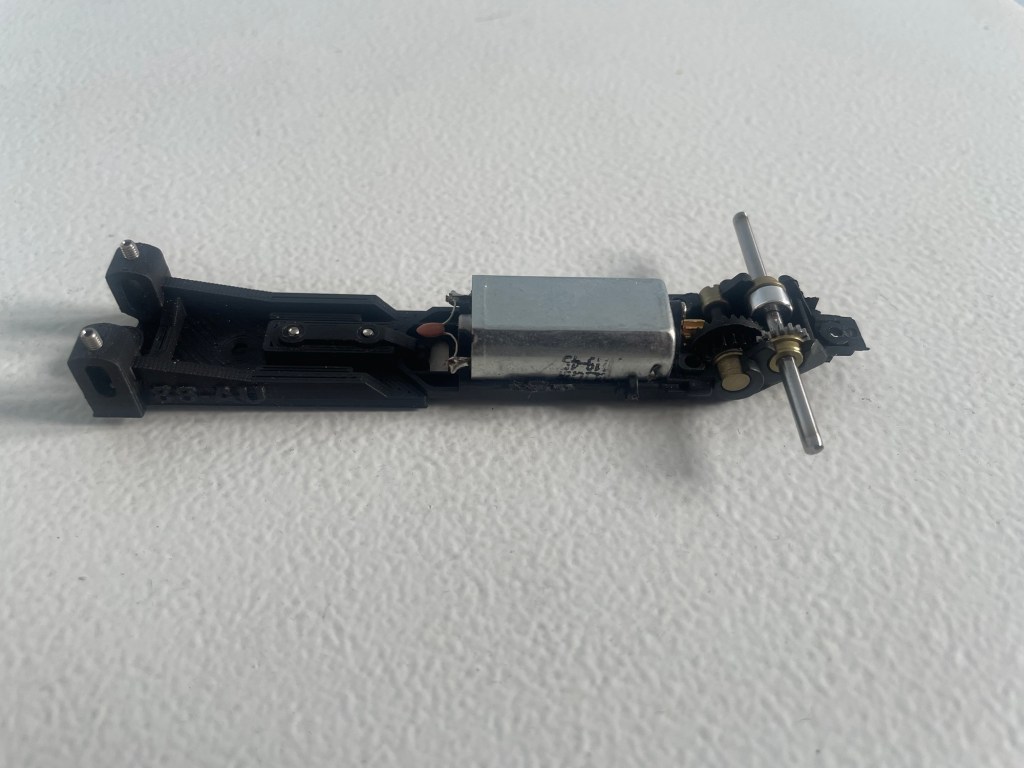
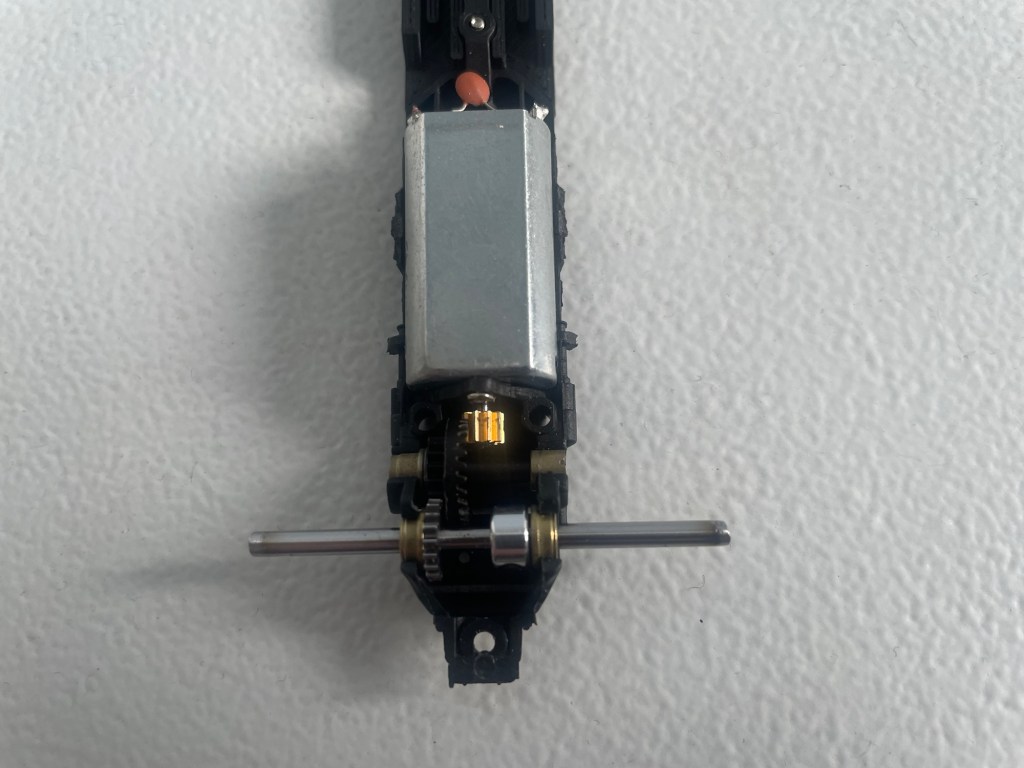
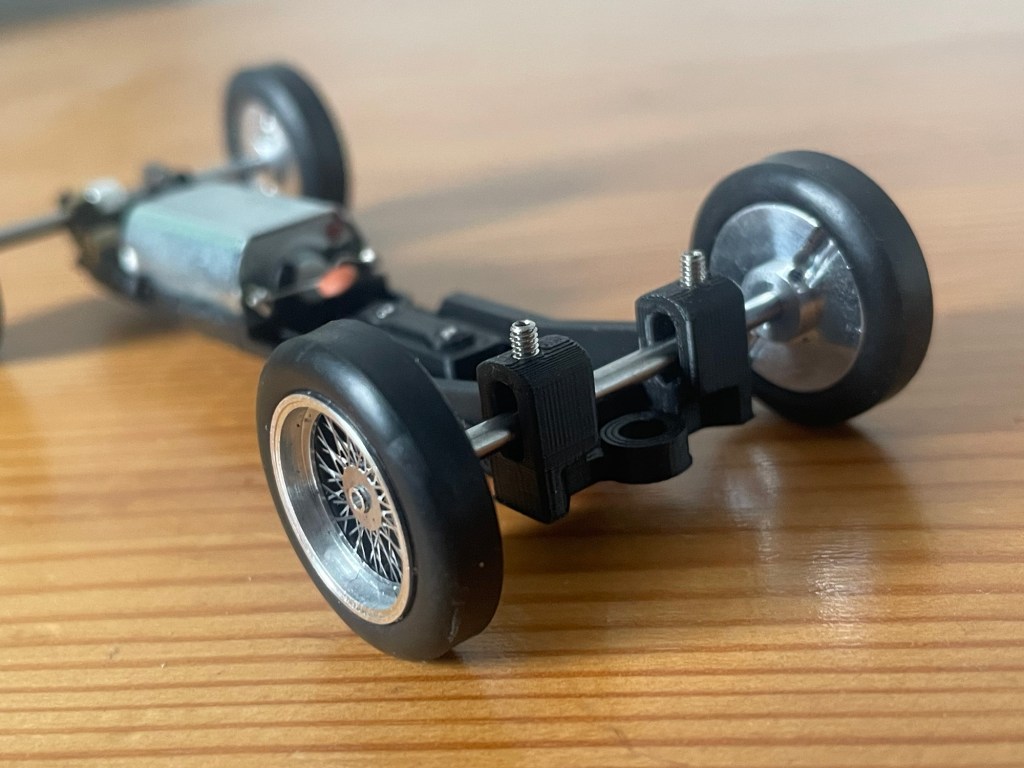
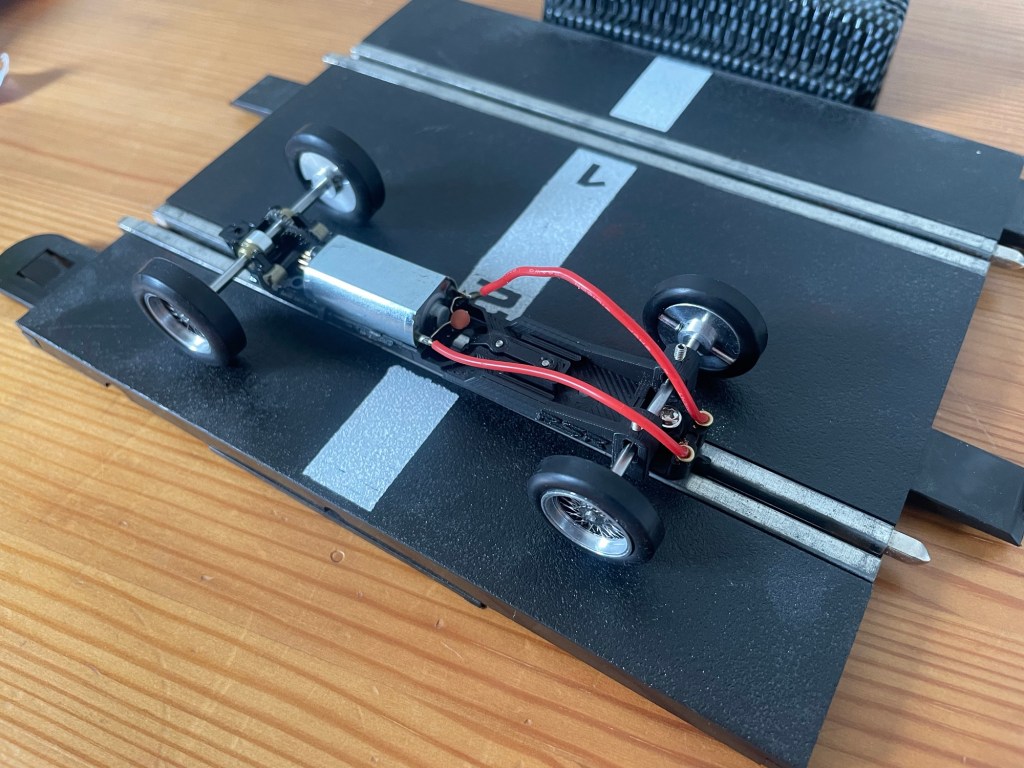
The absolute stand out part of this kit for me was the 3d printed chassis.
It has height adjustment for the front axle via a grub screw above and below the axle which is a nice touch. Ideally on a slot car you want the front tyres to be ever so slightly off the ground to reduce resistance and to aid in sharp cornering.
At the back of the chassis the car has a reduction like a model train.
Most slot cars simply have a pinion gear on the motor and then a large gear on the axle. Having the reducer gear means that you can use a much physically smaller (set of) gears whilst still maintaining a sensible ratio for the speed of the car.
The immediate benefit I can see to this is that you could use a much lower profile body. It will be interesting to see what cars they bring out with this chassis in the future!
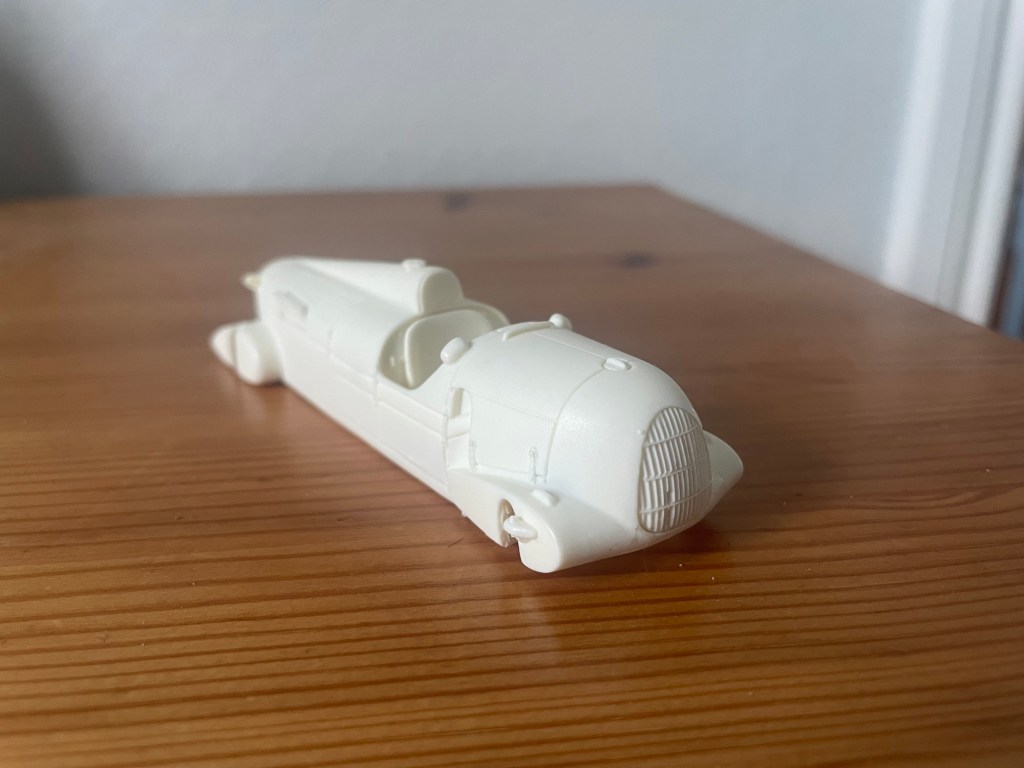
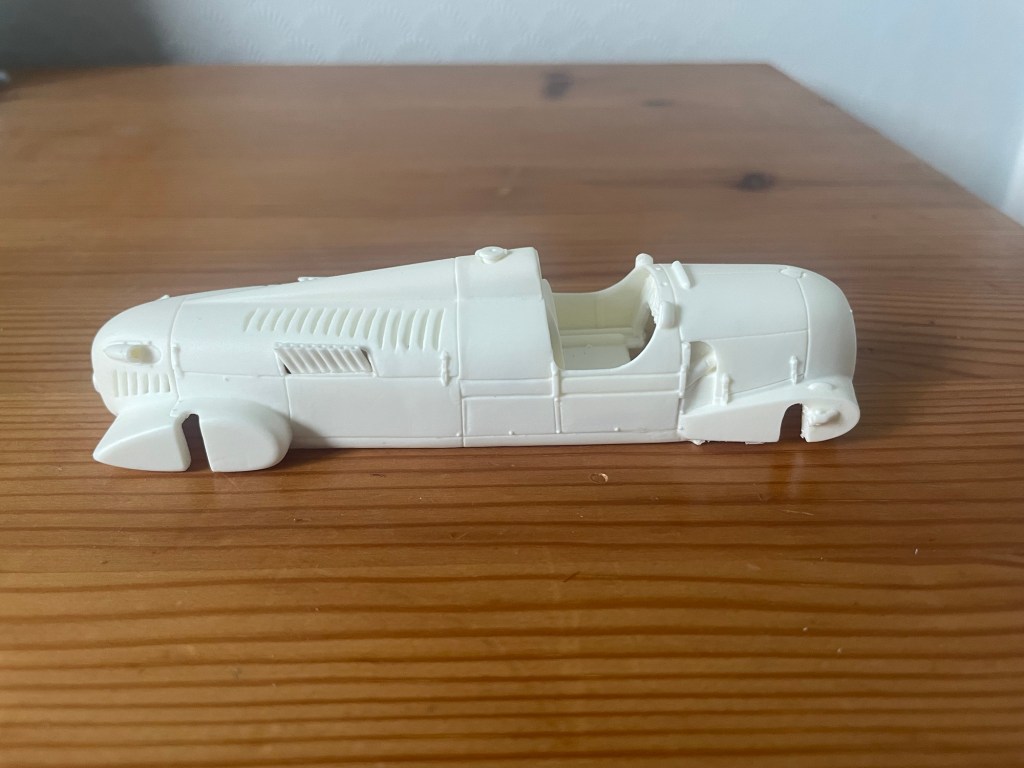
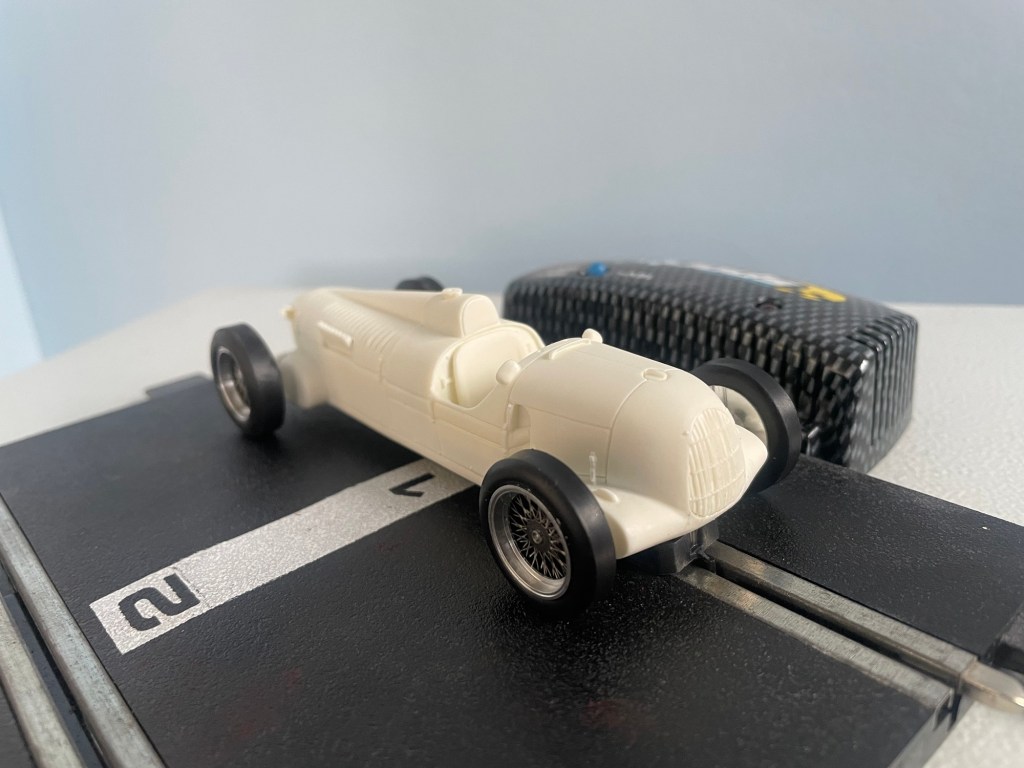
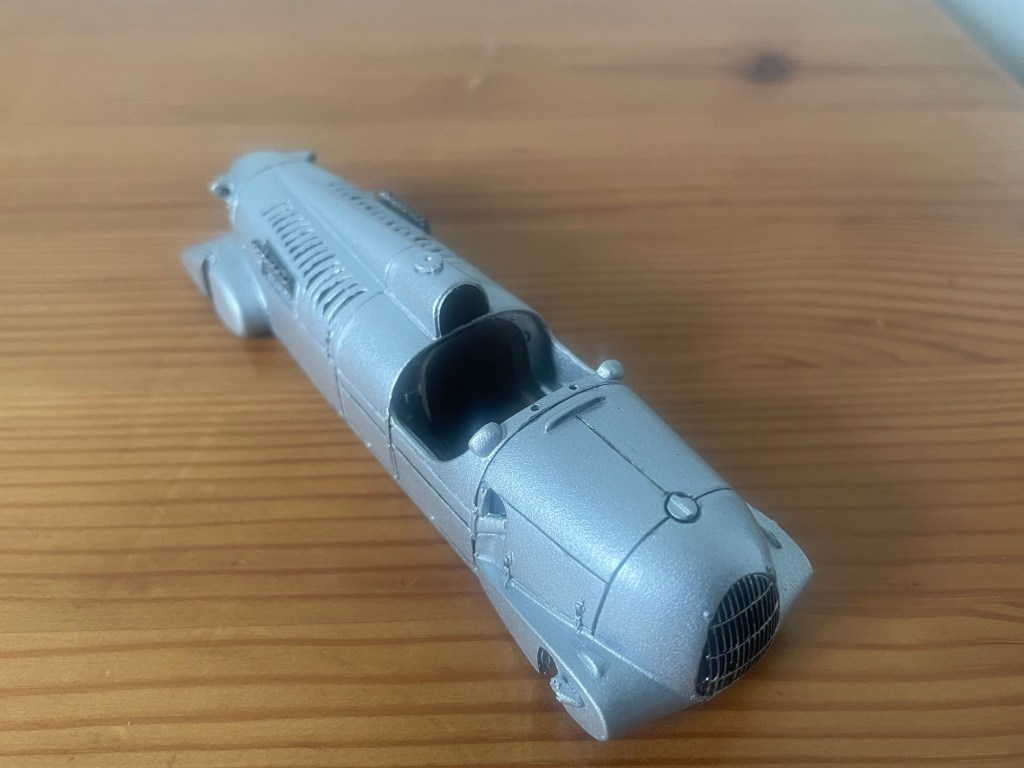
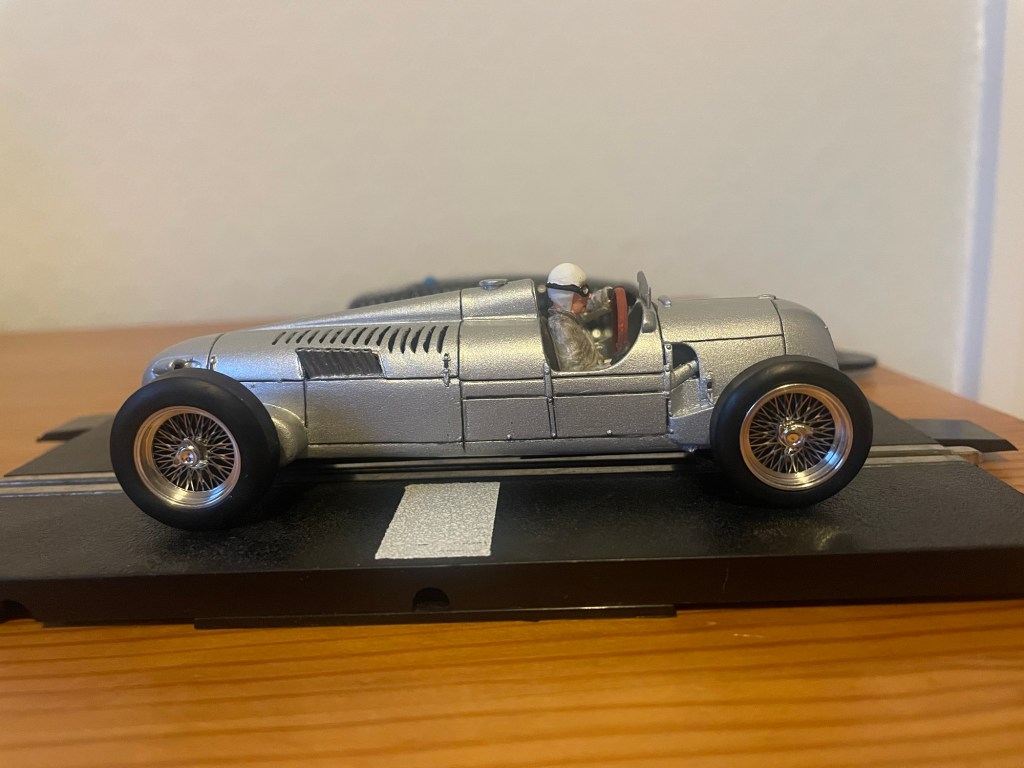
The body is nicely cast. The details are crisp and well defined and the panel lines are nice and fine.
There is a little bit of clean up to do around both the main body and the accessories – which is common with resin kits. Just carefully cut away the excess resin with a sharp modelling knife.
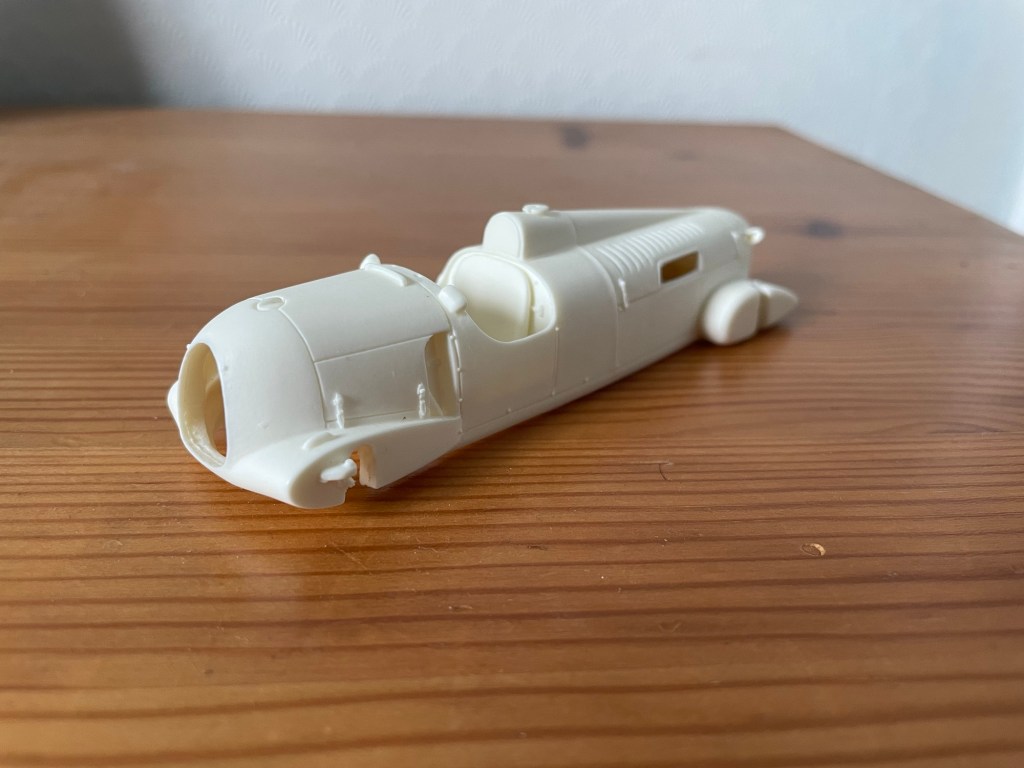
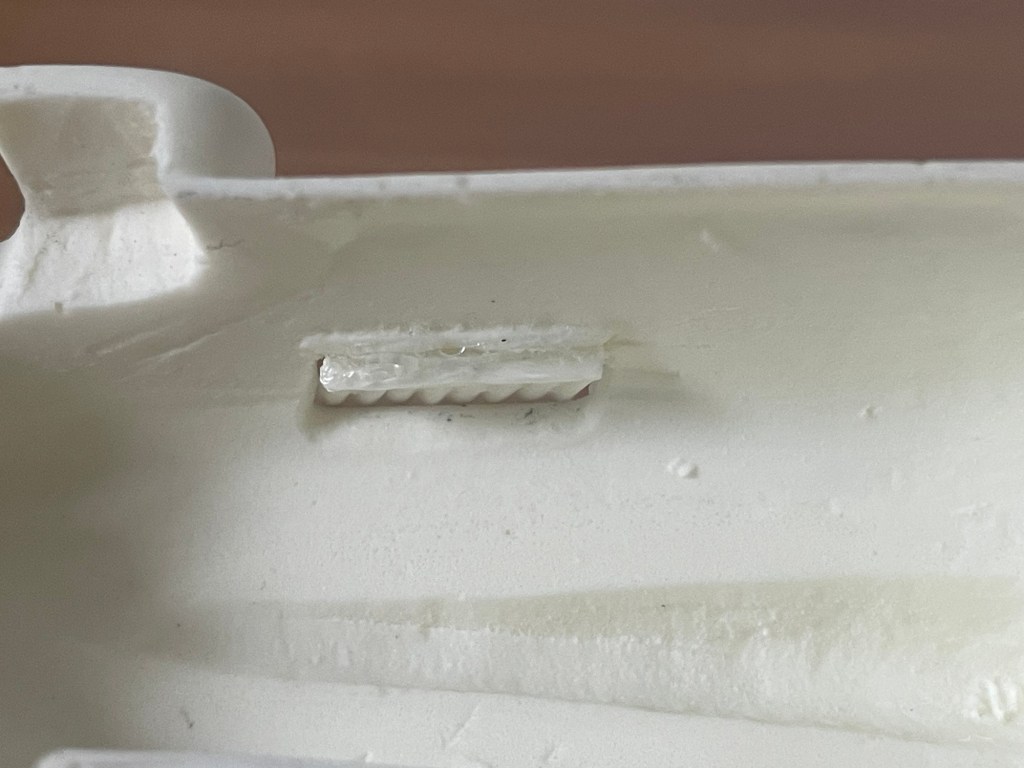
The grill is inserted from inside the shell. I didn’t picture it but the grill piece is really thick which gives you a good surface to apply a drop of glue to hold it to the body.
The exhausts were a bit of a head-scratcher at first. On the real car the exhausts come up vertically. When you put them in the correct place a little resin tab on the bottom of the exhausts sits on a handy shelf inside the body. It’s a genius bit of design!
As well as supergluing the exhausts to the shelf, I also reinforced it with a bit of a thicker UHU type glue.
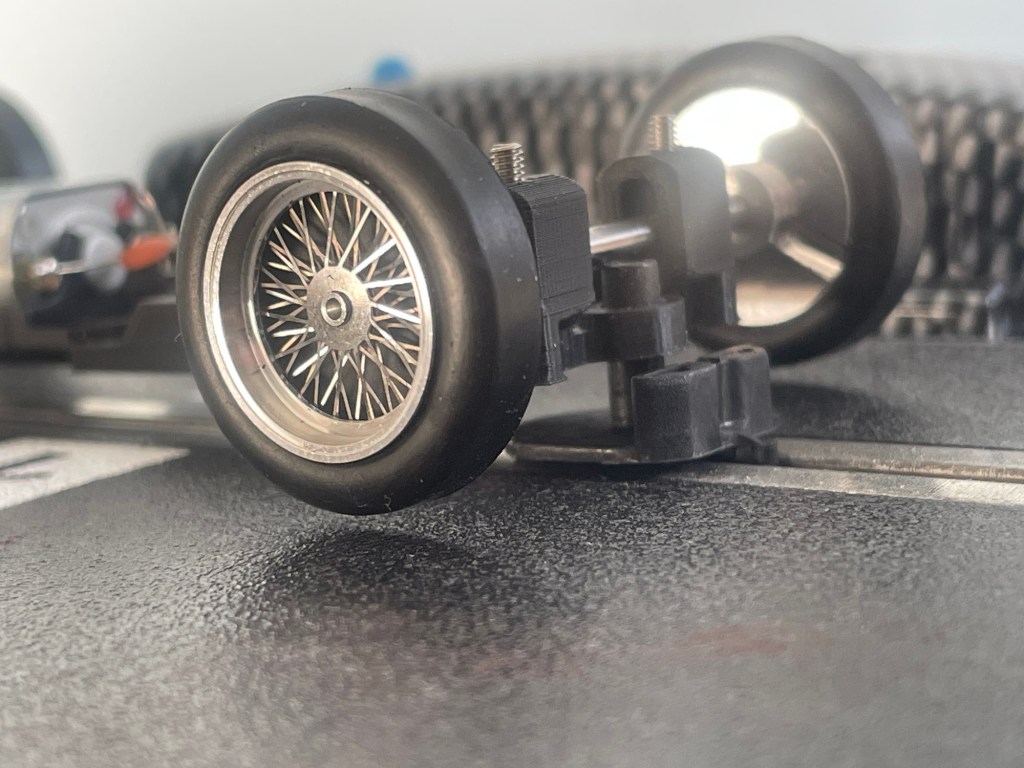
Here’s a slightly better look at the front axle adjustment now that the wheels are fitted. You can see the grub screws on top, they are mirrored underneath. You tighten/loosen them to set the height.
The wheels also came with the kit. They are lovely alloy pieces!
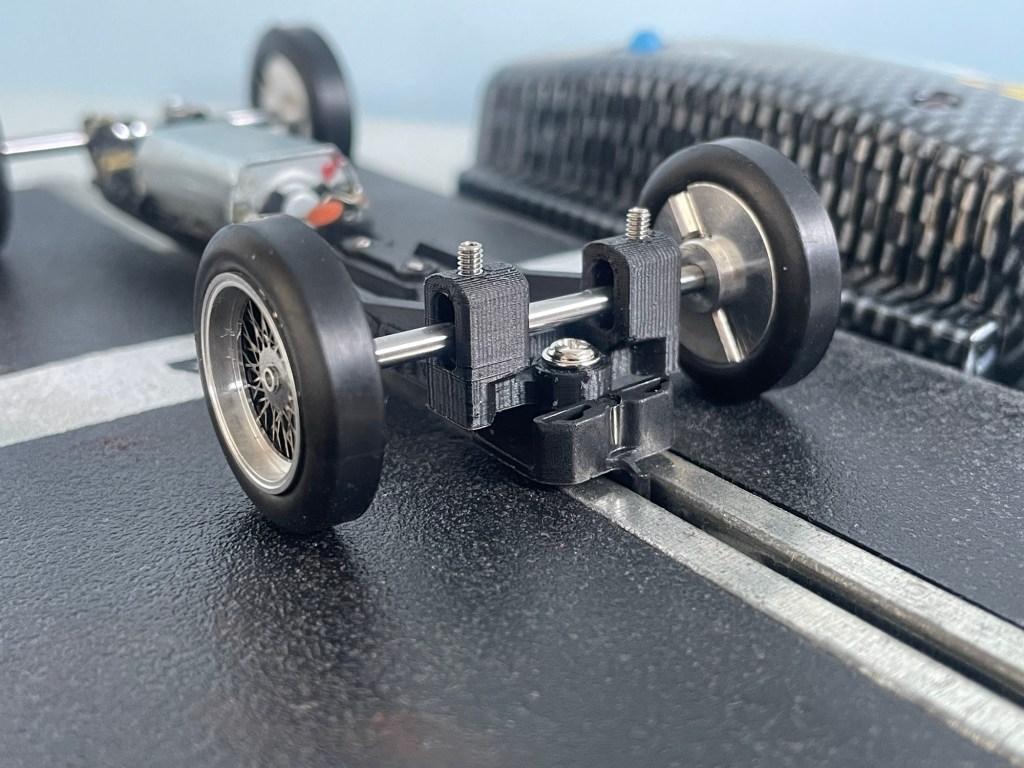
Initially the guide stem was too long and it was pushing the front of the car fully off of the floor.
As I mentioned earlier – with slot cars you ideally want the front wheels to be slightly raised if you’re looking to be competitive. However, when they’re too far off the floor it detracts from the model in my opinion.
To shorten the stem I simply cut it down with a razor saw. I did take a bit too much off, and the wheels are now well and truly on the floor haha! Always measure twice and cut once!
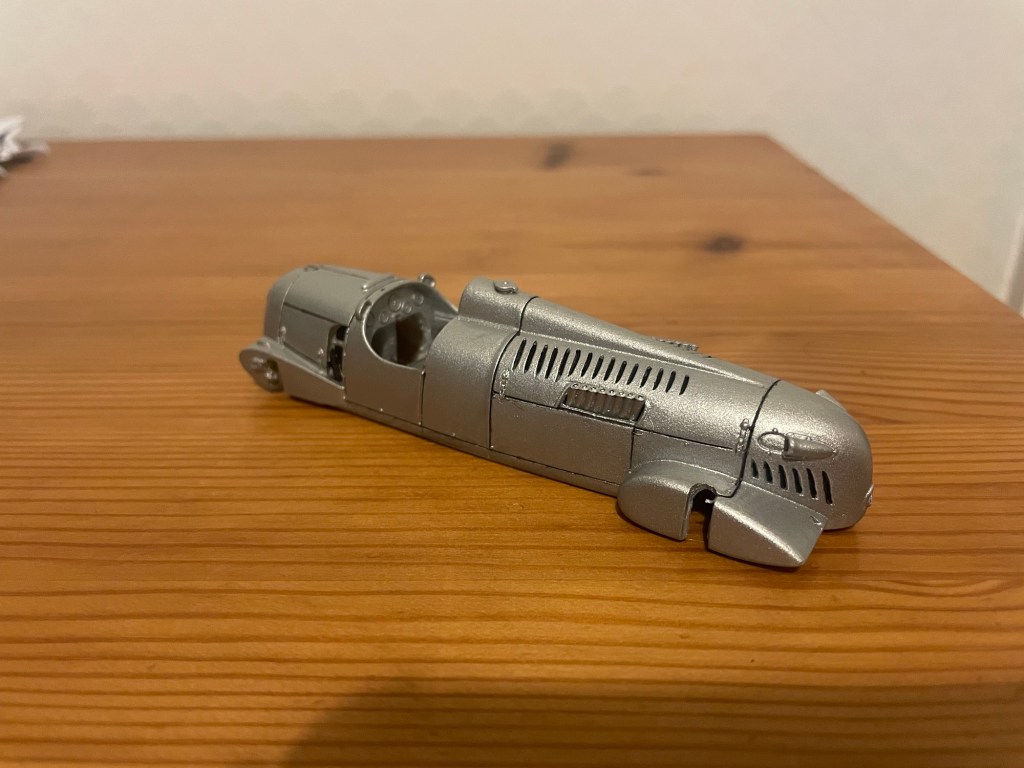
Test fitting the body!
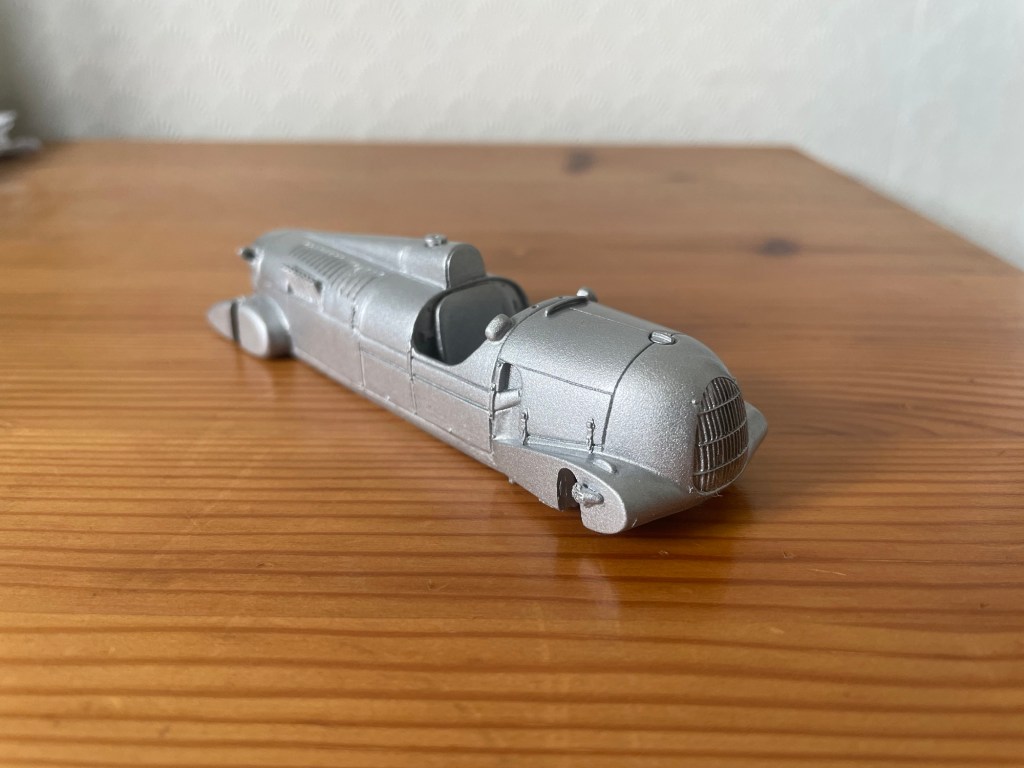
And the body is in top coat! I used a Halfords grey primer, then a cheap brand silver wheel paint, then two coats of Halfords lacquer to make it shine.

Wiring is standard for a slot car. I just used the wire, connections and braids provided with the kit.
In terms of painting this wasn’t a technical model. I filled the spaces in the grill and the vents at the back with Vallejo gloss black (it’s quite runny so perfect for getting into small nooks & crannies).
I also used Army Painter’s Dark Tone Wash in the panel lines. It’s my first time trying this and I think it looks pretty effective!


The exhausts were later done with Vallejo Oily Steel and the seat and the straps on the bonnet were done with Vallejo Leather Brown
Inside I just did a simple representation of the gauges. The dashboard on the real car was a simple sheet of aluminium, so I just left it body coloured.

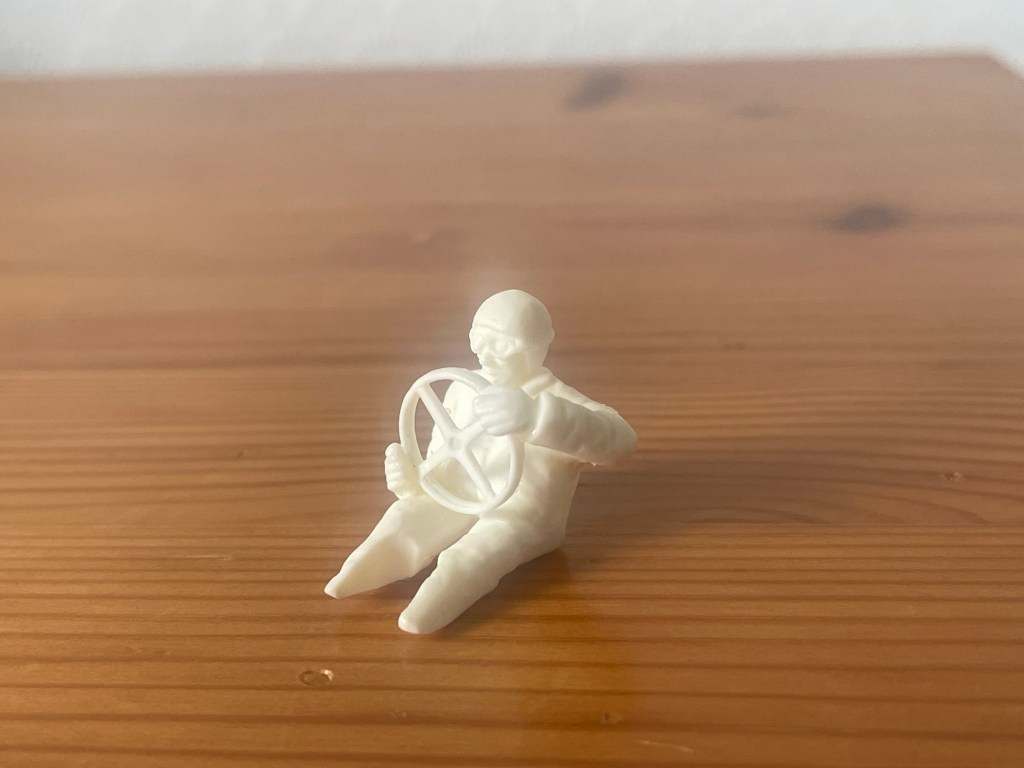
There was actually a choice of two driver figures with this kit. One driving forward and the other midway through a turn. I took the turning guy as he’s a bit more dynamic.
Quick confession – There was a steering column that you could attach to the wheel and dashboard, then put the driver in afterwards. I got in a pickle with it though, and decided it would be easier to stick the steering wheel to the driver.
Painted and in the car!
First he was primed white. The skin was done with Vallejo Basic Skin Tone. His lips were done with Army Painter Raging Rose. Goggles were done with Vallejo Black and the lenses picked out with Sky Grey. His gloves are Vallejo Leather Brown and the steering wheel is Vallejo Silver and Red Leather. I lightly went over his overalls with Army Painter Dark Tone Wash.
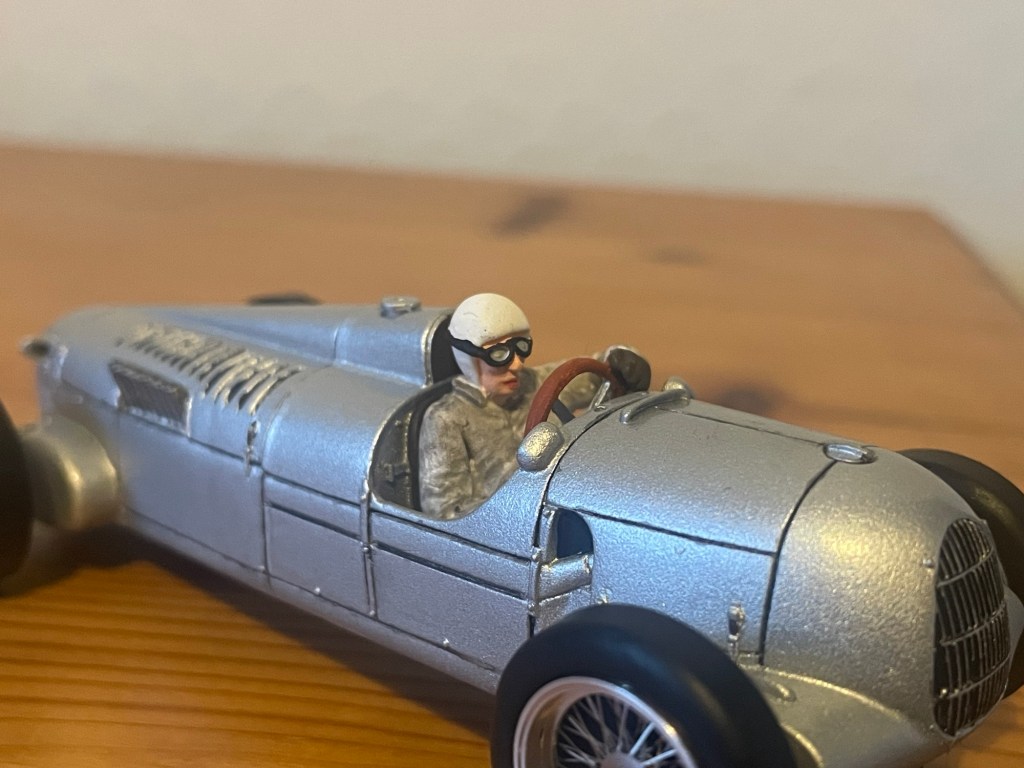
The windscreen is a brass frame supplied with the kit with a little bit of clear plastic cut to shape to represent the glass. Not breaking it a good incentive to not roll the car over haha!
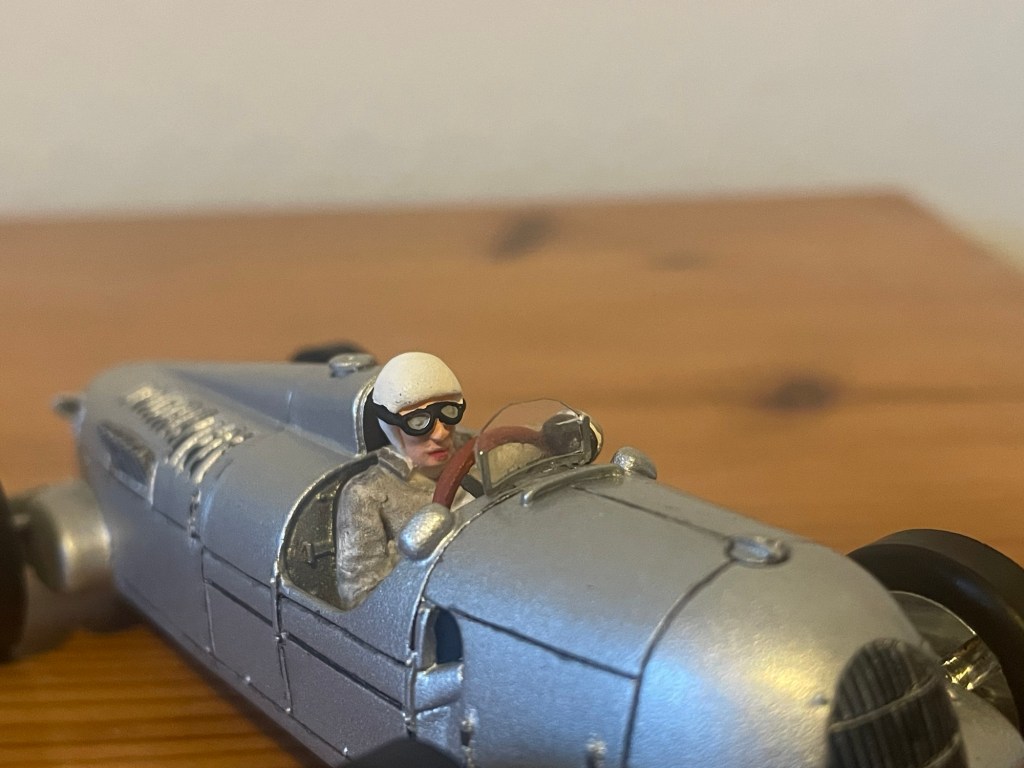
The knock off spinners were added to the wheels.
I then finished the kit off with the provided decals! I’ve tried to represent the car driven to 2nd place by Achille Varzi at the 1936 Monaco Grand Prix.


In conclusion I really enjoyed this kit. The little chassis with its reduction gear is a lovely piece of engineering and the rest of the car went together quickly and easily. It was a fun little project!
Thanks for reading! If you would like to stay up to date with all my blog posts please subscribe to the blog via email (from the box at the bottom of the page).
Follow me on the following social media platforms:
Facebook: www.facebook.com/motorsportformentalhealth/
Linkedin: www.linkedin.com/in/richard-francis-b45025137/
TikTok: @richardfrancismsfmh
Twitter: @richardmsfmh
Instagram: @motorsport4mentalhealth
Youtube: www.youtube.com/channel/UCQ-j8broFg4i2rWIBy6W82Q
By Richard Francis