

If you would like to help support this blog, please donate through Paypal here!
£5.00
In my time working at an auto retailing store, I found that there were a lot of people who struggled with changing the rear lights on the later shaped Fiesta.
There are a few of this generation Fiesta that live near me. When I noticed my neighbours had gone I jumped in the opportunity to change it for her so I could show you all how to do it.
There are two T20 sized bolts holding the rear light lens on inside the boot. At face value one would expect to take those off and pull the light away. You do need to remove these but unfortunately the light doesn’t come away that simply.

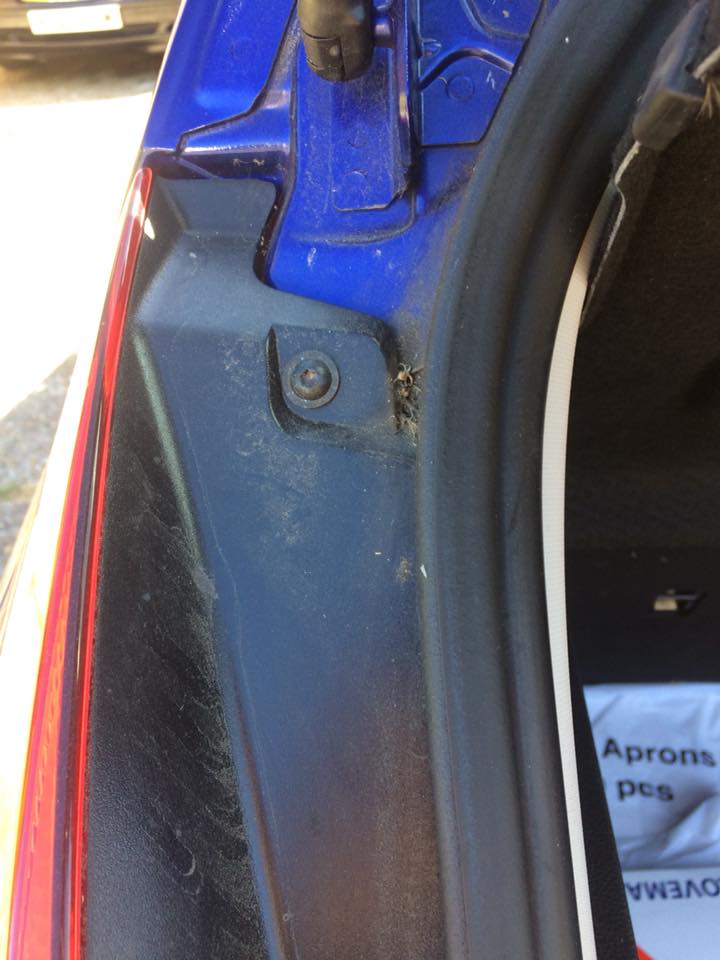
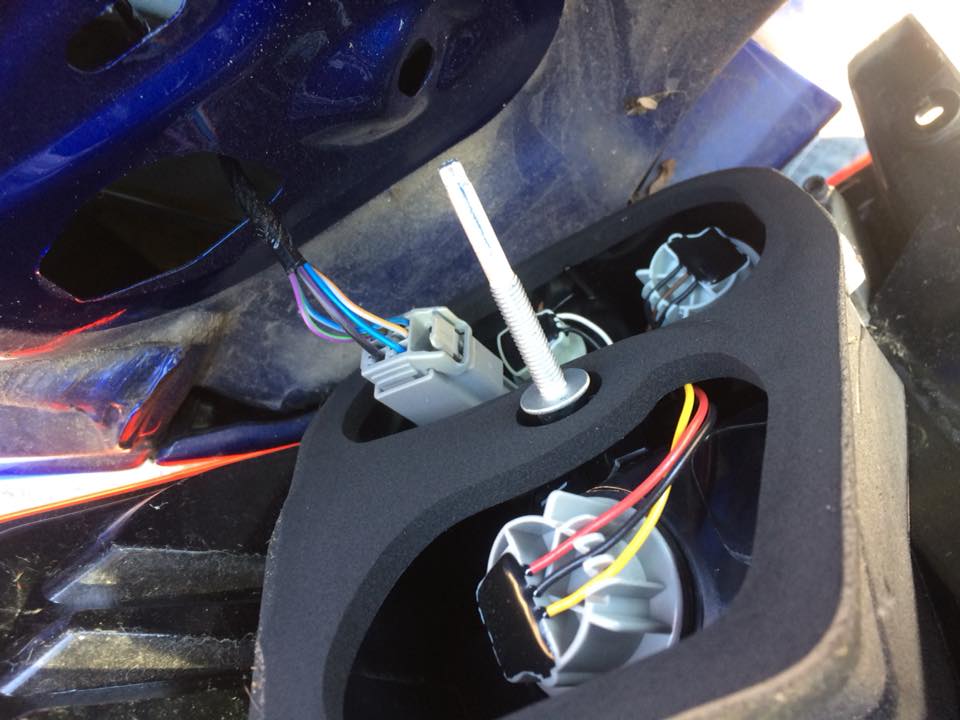
There is a third large plastic wing nut that holds the light in place. You have to get to that from behind the light. To access it you first have to remove this screw which is located on the plastic trim, behind the light inside the boot.
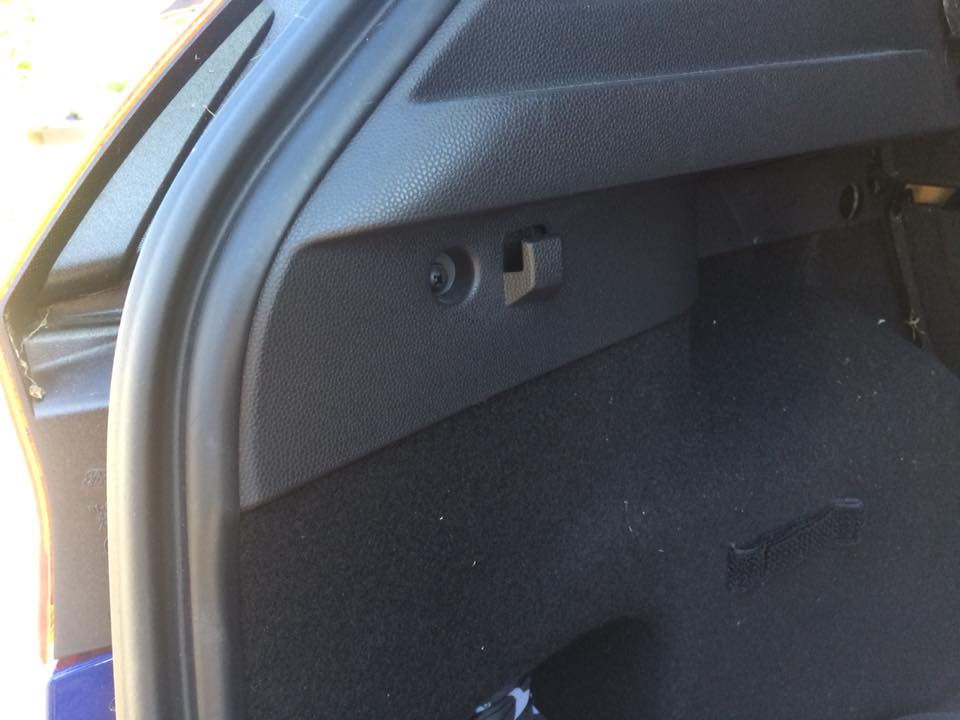
With that screw removed you will be able to fold down the carpet.
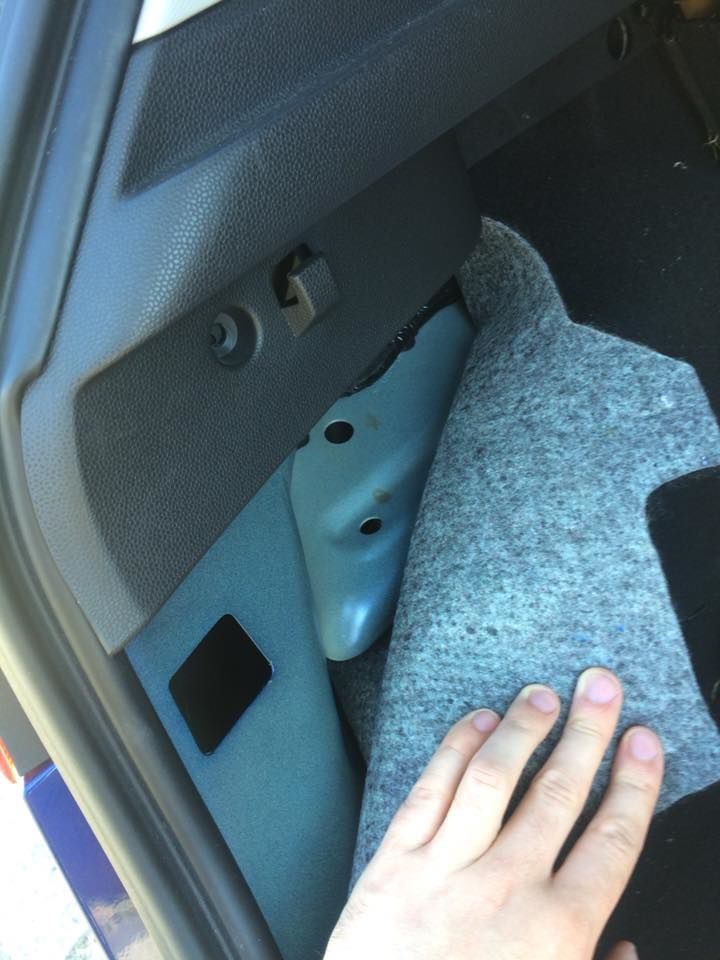
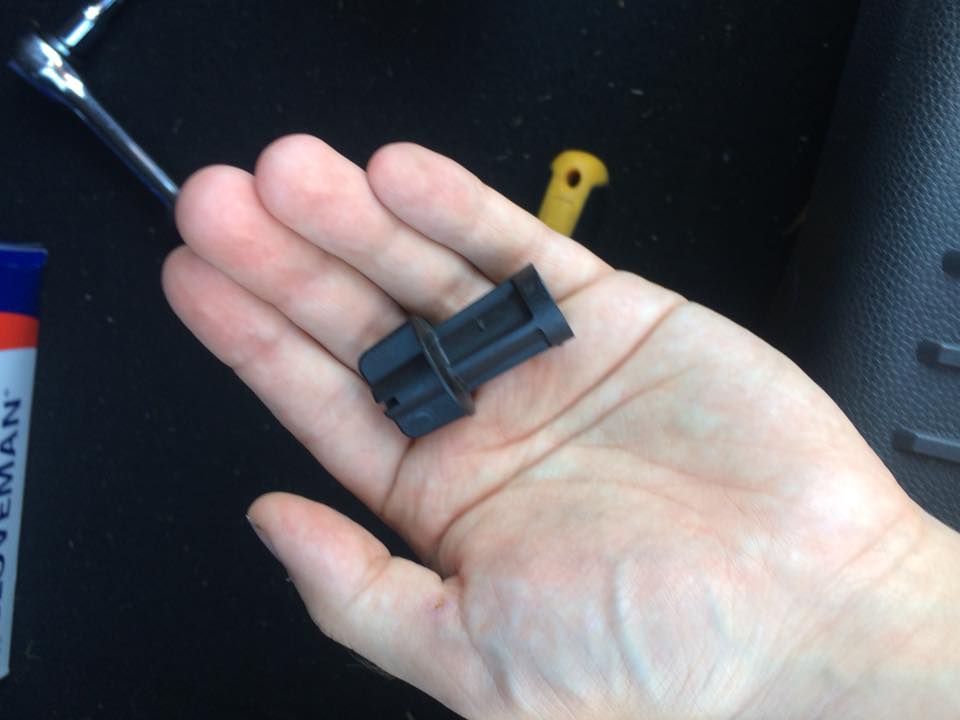
Slide your hand into the gap you’ve just made between the carpet and plastic trim and up towards the rear light. You will feel a plastic wing nut. Unscrew this. It comes off of a rather long thread and can be a little stiff to get started if it’s the car’s first change of bulb.
Here’s a picture of the aforementioned plastic wing nut so you know what to look for.
Once that’s out gently push on the thread and you feel the light coming away from the body of the car. There are two poppers towards the outside of the light holding it to the body of the car. They should just pop right out but if they are stiff try to get your fingers between the light and the body of the car to pull it away.
With the light out, all you need to do now is disconnect the plug and you will have the light completely off of the car.
To remove the plug, simply squeeze the little tab on the side and pull.
The brake and tail light plug is the large one in the centre of the light. To remove it, twist it anti clockwise and it should slide away from the main body of the light.

To remove the bulb, simply turn it and slide out. You will see two small pins on either side of the bulb that guide it correctly into it’s holder.
The bulb you are after is a dual element 380 or P21/5W available from Halfords or any other good auto retailer.

Putting it back together is simply the reversal of removal! Only thing to note is to make sure the little tab at the top of the carpet is seated under the plastic trim properly. You’ll know if it isn’t as the screw won’t want to go back in.
It’s one of those jobs that’s simple once you know how! Hopefully this has helped.
Thanks for reading, I hope you enjoyed! If you would like to help me make even better quality content on a more regular basis please donate via paypal through the button at the top or paypal me directly at motorsportformentalhealth@yahoo.co.uk.
You can also join my Patreon here: www.patreon.com/motorsportformentalhealth
If you would like to stay up to date with all my blog posts please subscribe to the blog via email (from the box at the bottom of the page) or follow me on the following social media platforms:
Facebook: www.facebook.com/motorsportformentalhealth/
Linkedin: http://www.linkedin.com/in/richard-francis-b45025137/
Instagram: @motorsport4mentalhealth
Youtube: www.youtube.com/channel/UCQ-j8broFg4i2rWIBy6W82Q
By Richard Francis
What about the central high stop lamp replacement?
I’ve not had to do that one yet! I’ll have a look over the weekend